AQS CountDownLatch源码解析 流殃 2021-08-21 2024-03-30 CountDownLatch源码解析
使用场景
在一个任务需要多个线程来执行,并且是需要线程在同一时间一起开始执行,这样的话,可以使用CountDownLatch
本质
虽然CountDownLatch这个类并没有直接继承AbstractQueuedSynchronizer,但是他使用的一个final修饰的变量sync继承AbstractQueuedSynchronizer,所以其本质上还是使用了AQS的共享模式
这个类的作用实际上就是在线程开始之后设置了一个栅栏,这个栅栏将所有线程阻塞住了,只有所有线程都激活的情况下,栅栏才会消失
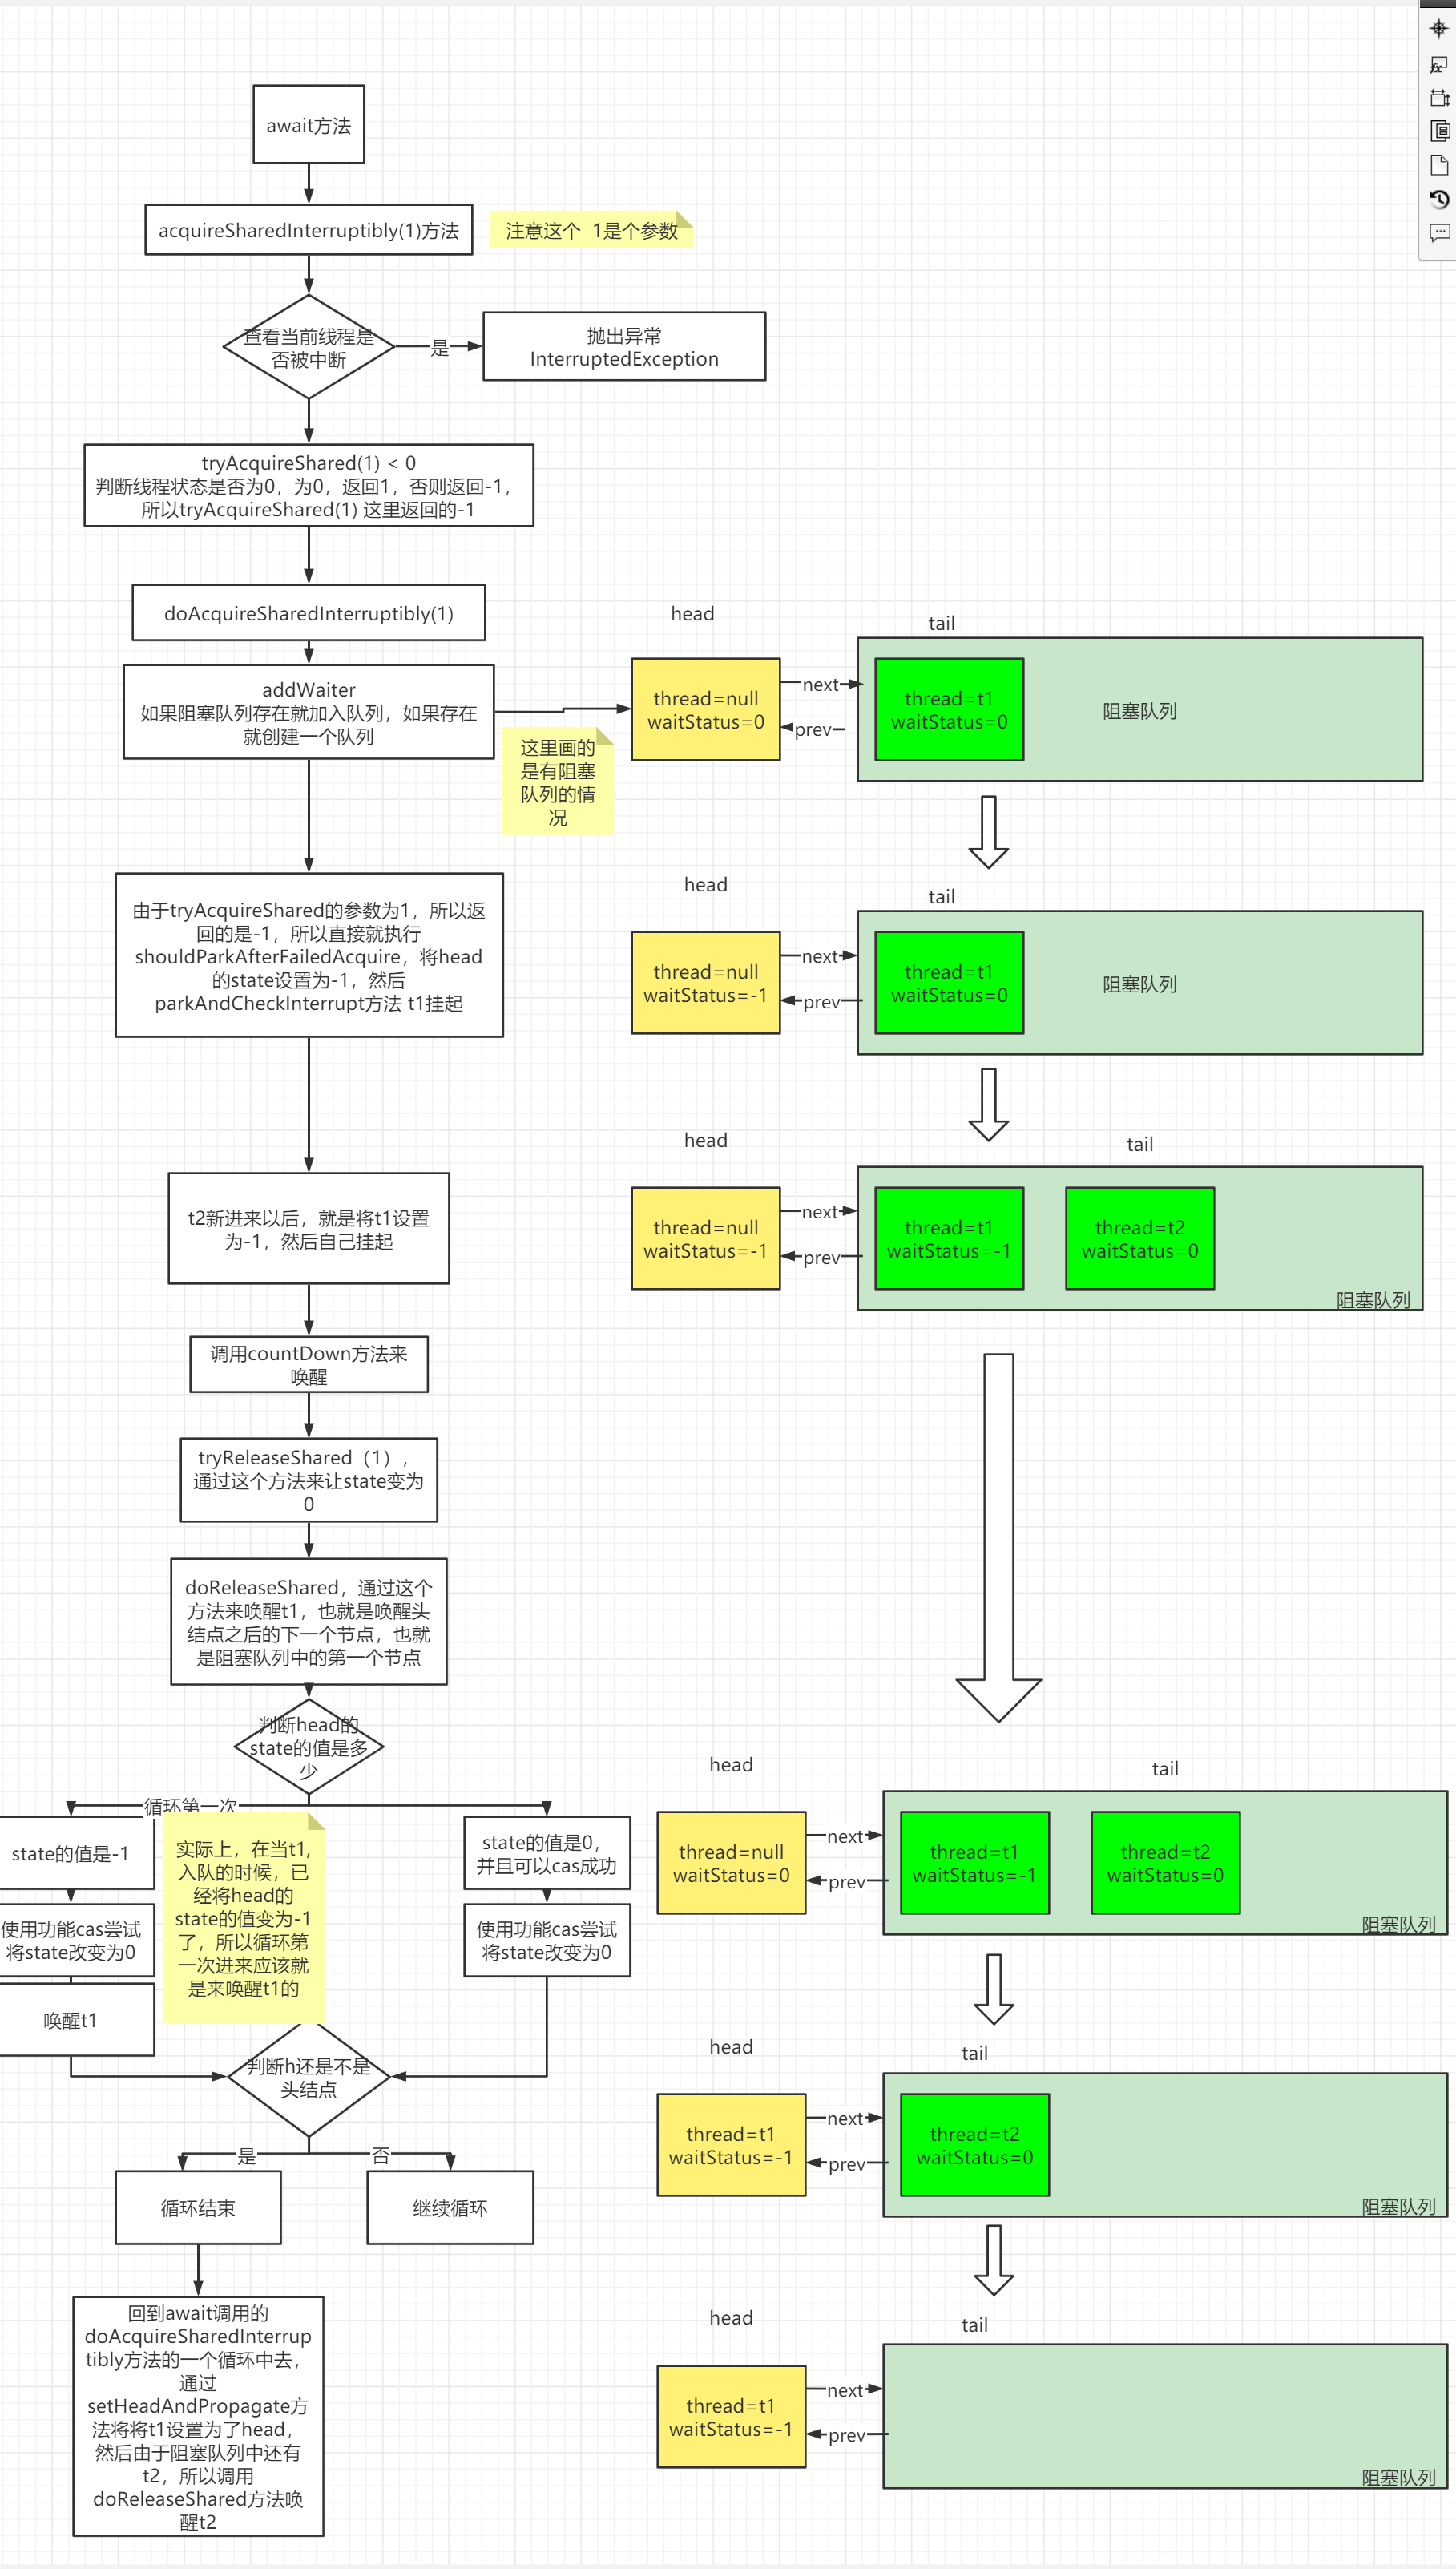
图解
源码分析 Sync 1 2 3 4 5 6 7 8 9 10 private static final class Sync extends AbstractQueuedSynchronizer { private static final long serialVersionUID = 4982264981922014374L ; Sync(int count) { setState(count); } int getCount () { return getState(); }
tryAcquireShared 1 2 3 4 5 protected int tryAcquireShared (int acquires) { return (getState() == 0 ) ? 1 : -1 ; }
tryReleaseShared 1 2 3 4 5 6 7 8 9 10 11 12 13 14 protected boolean tryReleaseShared (int releases) { for (;;) { int c = getState(); if (c == 0 ) return false ; int nextc = c-1 ; if (compareAndSetState(c, nextc)) return nextc == 0 ; } }
await 1 2 3 public void await () throws InterruptedException { sync.acquireSharedInterruptibly(1 ); }
acquireSharedInterruptibly 1 2 3 4 5 6 7 8 9 10 public final void acquireSharedInterruptibly (int arg) throws InterruptedException { if (Thread.interrupted()) throw new InterruptedException (); if (tryAcquireShared(arg) < 0 ) doAcquireSharedInterruptibly(arg); }
doAcquireSharedInterruptibly 1 2 3 4 5 6 7 8 9 10 11 12 13 14 15 16 17 18 19 20 21 22 23 24 25 26 27 28 29 30 private void doAcquireSharedInterruptibly (int arg) throws InterruptedException { final Node node = addWaiter(Node.SHARED); boolean failed = true ; try { for (;;) { final Node p = node.predecessor(); if (p == head) { int r = tryAcquireShared(arg); if (r >= 0 ) { setHeadAndPropagate(node, r); p.next = null ; failed = false ; return ; } } -1 if (shouldParkAfterFailedAcquire(p, node) && parkAndCheckInterrupt()) throw new InterruptedException (); } } finally { if (failed) cancelAcquire(node); } }
predecessor 1 2 3 4 5 6 7 final Node predecessor () throws NullPointerException { Node p = prev; if (p == null ) throw new NullPointerException (); else return p; }
countDown 1 2 3 public void countDown () { sync.releaseShared(1 ); }
releaseShared 1 2 3 4 5 6 7 8 9 10 public final boolean releaseShared (int arg) { if (tryReleaseShared(arg)) { doReleaseShared(); return true ; } return false ; }
doReleaseShared 1 2 3 4 5 6 7 8 9 10 11 12 13 14 15 16 17 18 19 20 private void doReleaseShared () { for (;;) { Node h = head; if (h != null && h != tail) { int ws = h.waitStatus; if (ws == Node.SIGNAL) { if (!compareAndSetWaitStatus(h, Node.SIGNAL, 0 )) continue ; unparkSuccessor(h); } else if (ws == 0 && !compareAndSetWaitStatus(h, 0 , Node.PROPAGATE)) continue ; } if (h == head) break ; } }
unparkSuccessor 1 2 3 4 5 6 7 8 9 10 11 12 13 14 15 16 private void unparkSuccessor (Node node) { int ws = node.waitStatus; if (ws < 0 ) compareAndSetWaitStatus(node, ws, 0 ); Node s = node.next; if (s == null || s.waitStatus > 0 ) { s = null ; for (Node t = tail; t != null && t != node; t = t.prev) if (t.waitStatus <= 0 ) s = t; } if (s != null ) LockSupport.unpark(s.thread); }
参考链接:一行一行源码分析清楚 AbstractQueuedSynchronizer (三)